

Learn how to prevent and fix rust on your vehicle - and avoid costly repair bills.
Rust can be one of the most damaging - yet preventable - problems your car faces over its lifetime.
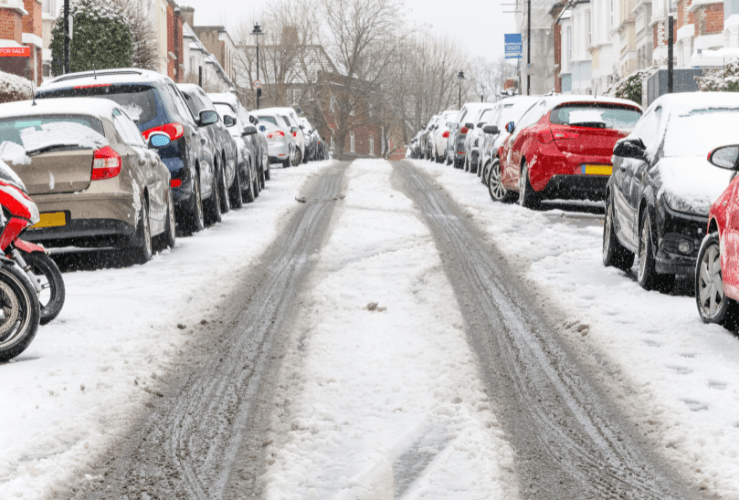
UK winters, with their regular rain, sleet and snow, make your vehicle vulnerable to rust, especially since salted roads often cause grit to be flung up into wheel arches and other areas, creating paintwork damage that allows the oxidation process to begin.
Learn how to get rid of rust with our guide…
How to repair rust on car: Top tips
- Don't rush it - you'll need to wait for the various layers to dry.
- Gather all the supplies and equipment you need before you begin.
- Watch online videos for extra tips and tricks.
- Always protect your eyes, respiratory tract, and hands from dust and repair products.
What causes rust on a car?
Rust forms when:
- Iron
- Oxygen
- Water
…combine in a chemical reaction.
Any vehicle component containing iron is vulnerable, particularly when exposed to moisture and damaged paintwork.
At what age do cars start to rust?
Many factors affect how quickly a vehicle starts to rust. Climate, damage, and the quality of paintwork can all affect this process.
However, it goes without saying that older cars will have had more bumps and scrapes, and will therefore be more likely to suffer from rust.
Types of rust
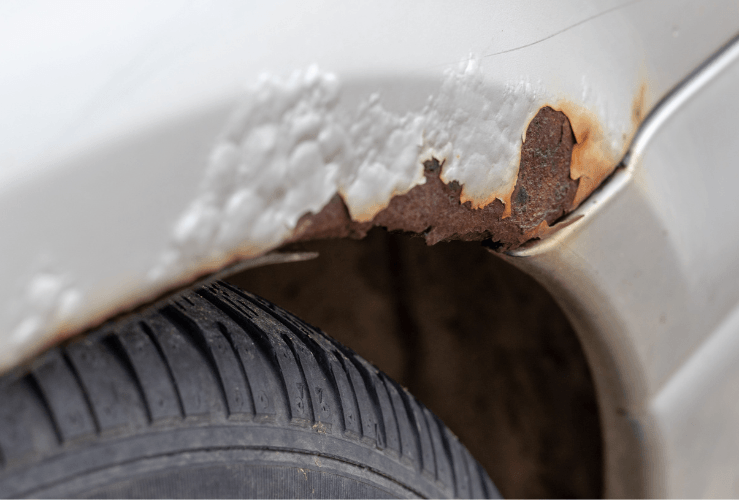
Cars are usually affected by red rust, which forms when high volumes of water come into contact with a contaminant, or paint damage that exposes the metal.
Brown rust can form if contaminants are left behind after the manufacturing process.
Black rust can form on a car when oxygen has been trapped (e.g. under paint) and appears more slowly than other rust types.
Yellow rust appears in metals submerged in water, so it is unlikely to affect your vehicle.
Common rust locations on a car
Certain parts of your car are more susceptible to rust, especially those featuring edges and/or where contact with road grit and water are common.
These areas include:
- Exhaust
- Suspension
- Frame rails
- Doors
- Boot floor
- Windscreen
- Wheel wells
Edges and grit-exposed areas are most vulnerable.
How to spot rust on your car
Aside from seeing a patch of red-brown rust, look for bubbled paint - this is a sure sign there is rust underneath.
Additionally, rust often lurks under damp carpets and fabrics. You'll need to jack up your vehicle to check for rust on the inside panels/undercarriage.
Early rust treatment prevents structural damage.
Should I buy a car with signs of rust?
It's best to avoid buying a vehicle with clear signs of rust. In particular, a rusted exhaust could cost you a lot to repair.
While a rusted car may seem like a bargain, it can be deleterious to your wallet eventually.
Car rust and corrosion repair costs
Rust repair costs can vary wildly, depending on the location and extent of the damage.
A very rough guide is up to £200 for minor rust damage, to around £350 for more serious rust repairs required for a car.

How to prevent car rust
Effective rust prevention dramatically reduces repair costs.
- Ensure your car is kept clean and dry, as far as possible.
- Wax regularly.
- Cover your car.
- Address any dents or scratches as soon as you spot them.
- Use rust inhibitor products.
- Clean your vehicle's undercarriage.
- Undertake regular checks for rust
Regular maintenance is the best defence against car corrosion.
How to get rid of rust on your car
Below is a practical guide to DIY rust removal and repair.
These are only rough guidelines - ensure you read the instructions for any products you buy.
How to fix rust on car: What you'll need
- Sandpaper: 80 - 5000 grit
- Rust reformer
- Body filler, gold filler
- Adhesive body patch
- Spray paint
- Wax
Other useful items:
- Filler mixing tool
- Soapy water
- Sponge
- Paper
- Masking tape
- Leaf blower (optional)
For protection:
Fixing rust creates a lot of dust, which you don't want in your eyes or respiratory tract - so eye protection and a mask are essential.
Gloves should help prevent being cut by any sharp edges or getting paint/primer on your hands.
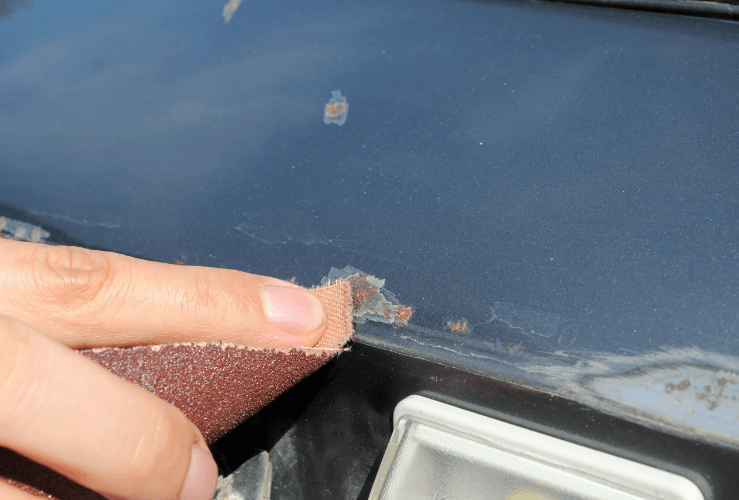
1. Remove the rust from your car with sandpaper
Before you begin sanding off the bubbled paint and rust from your car, use some rubbing alcohol or adhesive removing spray to take off any wax, debris, or dirt.
This prevents the paintwork from getting contaminated.
If there's an adjacent panel that might get damaged by the sanding process, remove it and replace it later.
Start with coarser sandpaper
Start sanding with a lower grit number, such as 80 (100, conversely, would be extremely fine grit). The lower the grit number, the coarser the grit on the sandpaper.
The sanding process will be easier if you use a sanding block.
Ensure you remove all traces of rust, or it will simply come back again.
Don't forget to wear your sanding mask, eye protection, and gloves
Sand the rusted area down to the bare metal; the filler will only adhere to bare metal.
It's best to sand into the paintwork that borders the rust to ensure you have gotten rid of all the rust. Equally, you don't want to sand off too much of the good paintwork.
You may have revealed some holes in the metal. You can remedy these with an adhesive body patch - which looks similar to chicken wire - along with body filler. More on this below.
Note that attachments are available for angle grinders and drills that make the sanding process quicker and easier. However, it's entirely possible to sand off the rust by hand.
Tackling Rust on the Inside of a Panel
And of course, you'll need to remove the rust on the opposite side of any rusted panels.
You may need to jack up the car and/or remove a wheel to access this inside rust.
Next, spray on rust reformer, which prepares the surface for painting, and chemically bonds to any remaining rust, converting it to a paintable surface.
Now spray on the undercoat - usually a rubber-based coat that lays on thick. Since it's rubberised, it won't chip like normal paint.
2. Cover the affected area with body filler
Adding body patch and filler
For the front side of the affected area, cut some adhesive body patch material and apply it behind the surface (this may not be necessary in every situation).
This patch will strengthen the affected area and ready it for body filler application.
Next, mix the filler and hardener together on a piece of paper with a mixing tool (such as a putty knife). Refer to the instructions for the mix ratio.
Aim to gather and spread the mixture, rather than mixing it like a cake - this will prevent air bubbles from forming. Don't mix too long as it will begin to harden. Keep the mixture spread out to help keep it cool and prevent it from hardening as you go to work.
Add the filler in layers. Don't worry too much about the appearance - this layer is for strength.
The filler should be dry in about 20 minutes.
Now, sand down the body filler with some coarse sandpaper - of around 40.
Consider using a fan to blow away the dust as you sand.
Note any body lines and fashion the filler to keep the original factory contours. Aim to blend the filler into the body panel.
Apply gold filler
Now it's time to add your gold filler top layer.
Mix the gold filler with hardener in the same way as before - spread and gather rather than mix, to prevent air bubbles.
Next, apply the filler to the affected area in thin layers. Build up the layers so the filler is thicker than the panel.
This should be dry in about 20 minutes - and it's time to start sanding again.
Start with an 80-grit paper, then move on to 180 grit, followed by 320 and 400. The aim is to render the surface as smooth as possible, in line with the body contours.
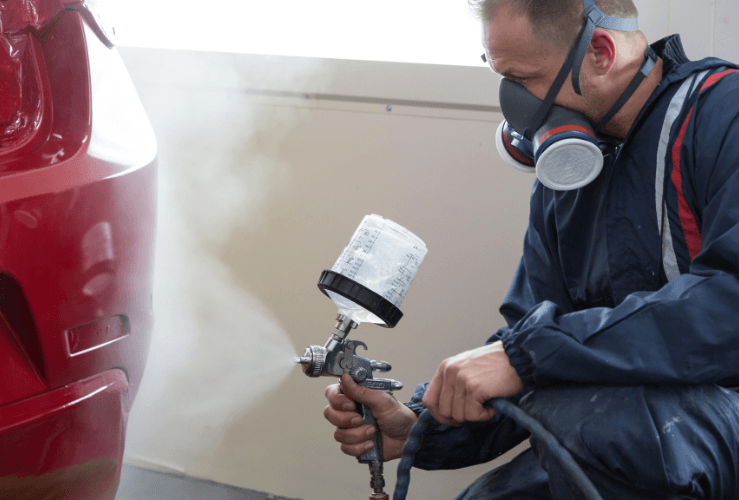
3. Paint the Affected Area
The next stage is to spray on the paint.
Before you start, clean the area with rubbing alcohol so you don't have any debris under the paint.
Use a leaf blower (or anything you have to hand) to blow away any remaining dust from the area.
Next, apply primer spray paint to the repaired area
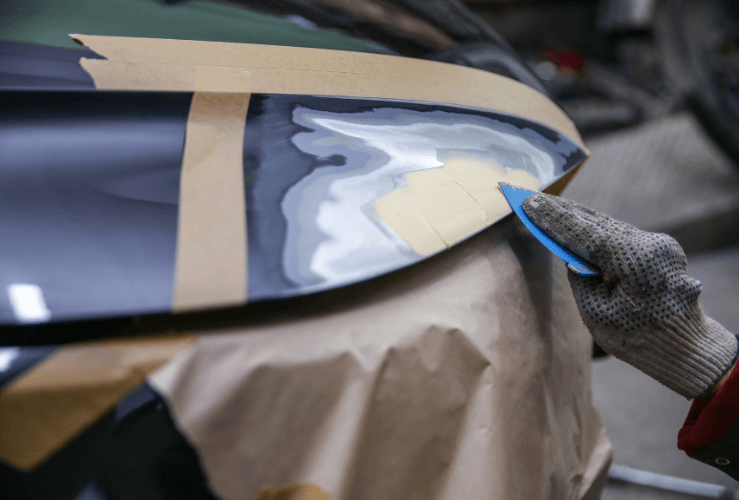
You should mask off the surrounding area to prevent primer adhering to the good paintwork. Then sand off the primer with 600 grit sandpaper, so there's a smooth transition from the existing paintwork to the repaired area – a border of about 2 inches.
Now the surface is ready to be painted with the topcoat
If you don't feel confident doing this, you can take your car to a paint shop; it will still be much cheaper than paying for a full repair job since you have done the body repair yourself. Remember to mask off the surrounding area, including tyres etc.
Spray on light layers of paint to prevent it from running. Let the paint dry between sprayings. The end result should be an even matte layer.
Then it's time to spray on about three layers of clear coat.
Wet sanding
You should let the clear coat dry for a day or two.
You may notice a layer of paler clear coat as it dried in the air and landed in the surrounding area. You can remove this with a little 'wet sanding'. This involves using very fine sandpaper of 1500 grit, soaking it, then wrapping it around a sponge. You then apply gentle pressure to the panel and remove any excess clear coat. Sand in long straight lines, not circular motions.
You should repeat this wet sanding process with 1500, 2000, and 5000 grit sandpaper.
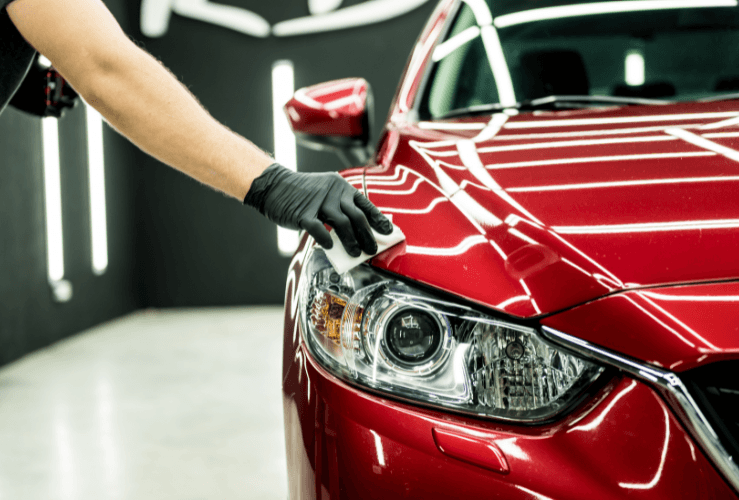
The final step is to buff the surface with wax to bring back the shine
With luck, the formerly rusted area will look factory new.
Need help with car maintenance?
Whether you're tackling rust repair yourself or considering professional work, staying informed is key.
Explore our other guides:
- How to protect your car in winter
- Car servicing and repairs
- The most common reasons for failing your MOT
Keeping on top of maintenance today can prevent expensive repairs tomorrow.
Frequently Asked Questions
Yes, it's entirely possible to fix rust on your vehicle yourself.
While it will take time and effort, it is less complex than some automotive repair jobs.
And of course, doing it yourself could save a significant sum compared to hiring a professional to repair the rust damage to your car.
By learning how to repair a rusted patch, you'll be ready for future rust problems. Additionally, once you've bought all the required supplies, you should have enough for later repairs.
Costs vary depending on severity and location:
- Minor surface rust: up to £200
- More extensive repairs: £300–£350+
Structural damage may cost significantly more.
If completed properly and sealed well, repairs can last many years, especially when combined with ongoing rust prevention measures.