

Can you fit your own tow bar?
If you have made few or no DIY modifications to your car, you may find fitting a towbar beyond your ability.
However, those with moderate experience and understanding of vehicles should be able to fit a tow bar themselves.
You can also check our towing weights guide here.
If you do not feel entirely confident about fitting a tow bar, enlist a garage or autocentre to do it for you.
If you can fit it yourself, however, you will save several hundred pounds.
Note: Unless it’s a universal fitting, diy tow bar kits vary according to the vehicle they are designed for. Precisely how they are fitted also varies. The following is a rough guide only.
Read up about tow bars and your car
Refer to your manual to find out how to fit a tow bar to your car.
If the manual does not cover the topic, contact your dealership or the manufacturer directly.
Best cars for towing?
We list our five favourite cars for towing here.
Types of tow bar explained
There are four main types of tow bars.
Here we explain what each looks like, and how it works.
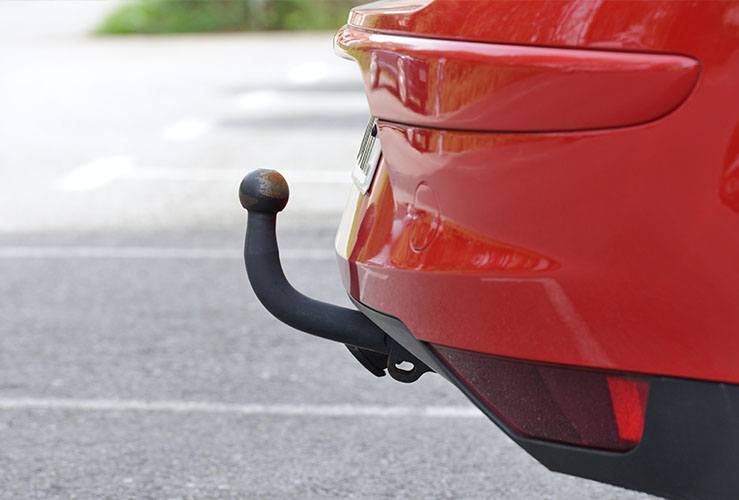
Flange Towbar
Fitted to a flange plate on the vehicle's underside, this tow bar has 2 or 4 bolts.
Due to the visible bolts and parts, it's considered rather unsightly.
Swan neck tow bar
Named for its long, neck-like design, the swan-neck tow bar is attached directly to the car's underside and is less obvious and inelegant than the flange tow bar set-up.
Fixed tow bar
Encompassing both flange and swan-neck designs, the fixed tow bar cannot be removed with ease - as the name implies.
Detachable tow bar
Conversely, the detachable tow bar can be removed simply and easily - thanks to its quick-release handle.
A note on tow bar electrics
Tow bar electrics take the form of dedicated kits, universal kits, 7-pins, 7-pin twins and 13-pins.
Electrical kits are legal requirements since they ensure the safety features of your vehicle work with whatever you are towing.
Dedicated or universal kits?
Universal kits work with multiple vehicles, while dedicated kits are designed for specific cars.
It's highly advisable to choose a dedicated kit since this should rule out any connection issues between your car and the trailer/caravan.
While more costly than universal kits, they are easier to set up and could save your life.
7-pins, 7-pin twins, and 13-pins
7-pin electrics are the cheapest and simplest to set-up. 7-pin electrics power the lighting boards of older caravans, cycle carriers, horseboxes and much else besides.
Critically, they do not power the inside of your caravan, if you have one.
7-pin twin set-ups are normally fitted in addition to regular 7 pins, and power things like fridges inside a caravan - and its reverse lights.
13-pin electrics have been on the market since 2008 and power the indicator, fog lights and brake lights on the caravan/trailer, plus appliances inside any caravan and its reverse lights.
How much is a tow bar?
Tow bar costs vary depending on the make and model of your car and the type of tow bar you require.
If you’re looking to purchase a tow bar to fix yourself, sites such as Towbars UK enable you to find a suitable tow bar by searching the make and model of your vehicle.
What you will need to fit a tow bar:
- Patience
- A clean dry work area with lots of light
- Socket set
- Screwdrivers (Phillips head and flat) of various sizes/shank length
- Torque wrench
- Tape measure
You may also need:
- Cable ties to secure any wiring
How to fit a tow bar - step by step guide
Unpack and assemble the tow bar kit and tools.
Disconnect the car battery if you need to
Disconnect the car battery if you need to detach lighting units or any other rear components.
Bear in mind that you may not need to remove any parts, depending on how your car is designed and where the accessory attachment holes are (in this case the accessory is of course the tow bar).
It's easy to fix tow bars to some cars, others, not so much.
If required, remove any bumper supports.
As is the case with many newer cars with plastic bumpers, your tow bar will in effect offer structural support.
Cut the bumper (if plastic)
Your tow bar kit may come with a cut-out template for marking the bumper for cutting. Alternatively, you can measure and mark out the centre line yourself.
Use a fine-blade hacksaw or a small cutting tool to cut the bumper.
Locate the mounting key-holes
Locate the mounting key-holes on the rear underside of your car (most vehicles will have them).
Fit the tow-bar kit as per instructions.
Keep the fitting loose to start with and tighten up the assembly only when it is correctly fitted.
Fit the loom, if supplied
This makes it possible for your car to control brakes/brake lights/trailer stability control on the caravan.
For newer cars, looms are often vehicle-specific and interface with the car's electrics (current drain) so as to prevent the vehicle from thinking there is a fault.
Official aftermarket looms should also ensure any warranty is unaffected.
And as mentioned, if your car has Trailer Stability Control, this will be activated by using the correct aftermarket loom.
The soldering option: For older cars it may be possible to simply solder necessary electrical cables.
Replace the bumper and any other components you removed
Re-torque based on the manufacturer's guidelines.
Fit the trailer connector
Attach the tow ball and fit the hitch to the receiver with the lock and pin.
Once it's all fitted and hitched up, check to ensure trailer/caravan brake lights are working - and that trailer stability control (if available) is operating as it should.
Now you know how to fit a tow bar, why not discover more about how to tow a caravan safely.