

If you’ve discovered a faulty bulb on your vehicle, it’s important to sort it promptly. Working lights ensure you remain visible to others, accurately communicate your intentions on the road, and avoid falling foul of lighting regulations.
Whether it’s a headlamp, indicator or brake light, the good news is that most replacements are straightforward and can be carried out at home with basic tools and a little patience.
Why is it important to change faulty vehicle bulbs?
Driving with a faulty lightbulb could see you pulled over by the police and being handed a hefty fine.
The Road Vehicles Lighting Regulations 1989 states "No person shall use … a vehicle unless every lamp, reflector, rear marking and device … is in good working order and, in the case of a lamp, clean."
Moreover, driving with a busted headlamp, indicator or brake light could put you, your passengers and other road users in danger. Without sufficient light, you won’t be able to see other vehicles as clearly, and they’ll be less able to see you.
In the case of indicators, other road users won't know which way you plan to turn.
Here we cover how to change a car light bulb.

Buying new car bulbs
When purchasing replacement car light bulbs, ensure the packaging is undamaged; a bent or creased corner, or dented plastic may suggest the bulb has been dropped.
A damaged bulb may burn out more quickly, or not work at all.
Note that the brighter the bulb, the shorter the life.
If your car lights are difficult to change, you may not want to swap them out too often - in which case, look for a bulb with moderate brightness and reasonable lifespan.
Always replace bulbs in pairs
Only replacing one light bulb will give uneven light, since the newer light bulb will give off more light than the one on the opposite side.
Check your vehicle's manual
First, check your owner's manual. It will detail the exact car bulb required and how to replace it. It may also have handy diagrams.
If you've lost your manual, check online for a PDF version, or Google how to replace the desired type of bulb on your specific make and model of car.
Learning how to change your car light bulb is something most drivers can achieve. However, if you’re a newer driver, are not as dexterous as you used to be, or simply don’t have enough time - just ask your local garage to do the job.
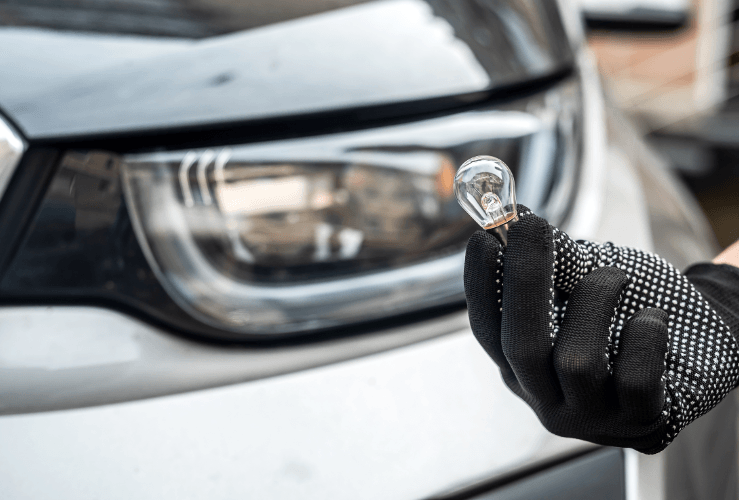
How to replace a headlight bulb
Before you start
- Switch off the engine.
- Wear clean gloves to avoid transferring oils to the glass, which can shorten the bulb’s life.
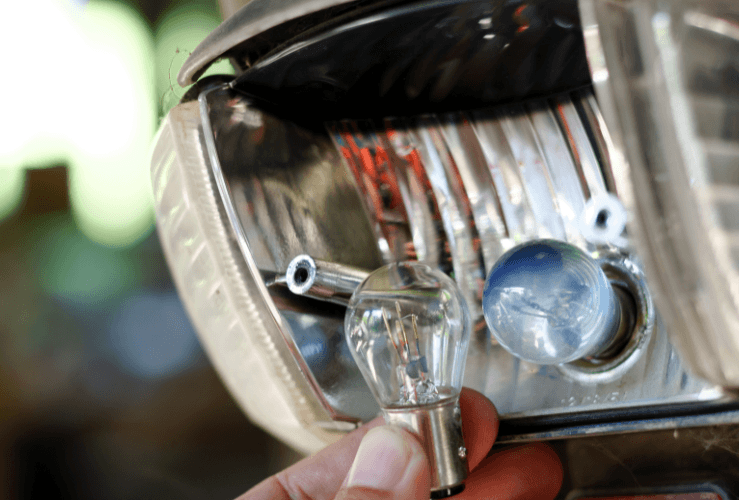
Removing the old headlight bulb
- Open the bonnet and locate the electrical connector behind the headlamp.
- Press the tabs on the connector and pull the connector, not the wires.
- Release any retaining clips or rings holding the bulb in place.
- Gently remove the bulb. Some models require you to twist it anti-clockwise to release.
Fitting the new headlight bulb
- Avoid touching the bulb glass.
- Slide the new bulb into position, ensuring the notches align correctly.
- Refit the retaining clips or twist clockwise to secure.
- Reconnect the electrical plug.
- Repeat for the opposite side.
- Switch on the lights to confirm both beams are bright and even.
If you’re unsure, a qualified mechanic can complete the job in minutes.
How to replace an indicator light
- Locate the indicator unit – often smaller and tucked toward the vehicle’s edge.
- Disconnect the power connector.
- Twist and remove the old bulb (usually a bayonet fitting).
- Insert the new bulb, pushing and twisting it clockwise to lock into place.
- Slot the casing back into position and reconnect the wiring.
- Test the indicator on both sides.
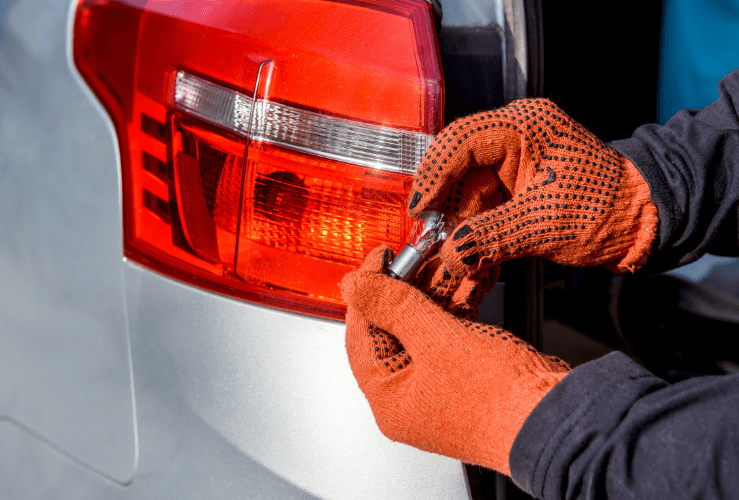
How to replace a brake light
- Open the boot and remove the internal light-cluster cover.
- Some covers are clipped in; others require a screwdriver.
- Unscrew and remove the light assembly from the vehicle.
- Stand outside the car and gently pull the assembly free. If it doesn’t move, check for hidden screws.
- Access the rear of the unit and twist the old bulb to the left to remove it.
- Insert the new bulb and twist to the right to secure.
- Fit the bulb holder back into the assembly using the alignment notches.
- Reattach the assembly and tighten all screws.
- Test the brake lights.
Note: Some brake-light units can be accessed directly from outside the car without entering the boot.
Need help staying safe on the road?
If you’d prefer not to tackle bulb changes yourself or want peace of mind should something fail while travelling, consider upgrading to reliable breakdown cover. A good policy ensures you’re never stranded with lighting faults or other unexpected issues.
Explore our breakdown cover options today!
Frequently Asked Questions
There’s no fixed schedule, as lifespan depends on usage, bulb type and driving conditions. Many bulbs last several years, but replace any dimming or flickering bulb promptly and consider changing paired bulbs at the same time.
Use clean cotton or latex gloves. These prevent skin oils from marking the glass, which can create heat spots and reduce bulb longevity.
Check that the bulb is seated correctly, the contacts are clean, and the connector is fully attached. If the issue persists, the fault may lie with the wiring, fuse or relay, and a mechanic should investigate.
You can, but it’s generally best to use matching bulbs for consistency in brightness and colour. Mismatched bulbs can result in uneven lighting, especially in pairs such as headlights.